Madcar Plugin 3ds Max Meuble
(max crashed when i tried this) i just selected all the different object with the “pick.
3ds max is one of the powerful 3d packages with lots of great functionalities of modeling, animation, particles-dynamics and more. But everyone is not able to utilize every feature of max efficiently, for example, many people find max particle flow too difficult to use and same with 3ds max skinning tools.
Thanks to all tool developers and companies who have developed some awesome and very useful plugins that can be used as an alternative to 3ds max native tools. Here are some best plugins that can help you improve your output quality and also fasten your workflow.
Vue xStream
Vue xStream is one of the most popular tools for creating rich and realistic natural environments used by lots of well-known studios and cg professionals. It’s an ultimate pack for digital-matte painters, architects and 3d environment artists.
Krakatoa
Karkatoa is a volumetric particle rendering, manipulation and management toolkit developed by Thinkbox Software. Krakatoa uses a unique particle partitioning method to speed up the process. It supports 3ds max native deformers and modifiers for particle deforming process and compatible with 3ds max built-in particle system with great support of data exchange with other 3d packages and particle simulation applications.
Krakatoa has been used in lots of popular projects like Superman Returns, The Avengers, Avatar and Thor.
Rayfire
Rayfire is an ideal tool for creating fragmented geometries, destructions and break downs. It has an Interactive Demolition system which demolishes objects depending upon their material and collision strength. It supports animated voxelization, clusters, animated cracks, image tracking and tons of great features.
Wrapit 1.5
Wrapit is a great tool for retopolizing high res mesh to create a low density, clean mesh. It comes with a number of great features like Relax over Surface, Branch Painting etc. that help user to retopolize the complex meshes easily and quickly. It is available only for 3ds max 2009-2012 versions.
Dreamscape
Dreamscape is yet another great tool to create realistic landscapes including natural elements like mountains, sea, clouds and many more. The latest version of the Dreamscape comes with lots of great features like Terra object which uses new rendering technologies and occupy less amount of RAM for calculations.
MultiScatter
MultiScatter is an awesome scattering tool with a great set of features. It handles the file size in more better and smarter way than max so the user don’t have to worry about the file size while working on heavy scenes.
MultiScatter objects are compatible with both Mental ray and Vray renderer. Available for 3ds max 2008 (No Mental ray support) – 2014 (32-64 bit)
Afterburn 4.1.3
Afterburn is a volumetric effects that allows user to create some stunning effects like explosions, smoke, fire and dust. This plugin has been used in many cinematic productions like Flight of the Phoenix, Armageddon and Dracula
The latest version of the Afterburn comes with some more cool features like geometry clipping, MaxScript functionality and with seven different types of noise with the ability to use 3ds max 3d maps as noise source.Realflow
Realflow is an award winning plugin considered as an Industry standard, basically used for simulating fluids. It is easy to use and has a good compatibility with almost all major 3d platforms. It can be used for both large scale and small scale fluid simulations.
RailClone Lite
It is a must use tool for those who mostly work with building and architectures like architects and Interior designers. A great plugin to model buildings with parametric support comes with a library of predefined styles. Users can also create their own custom geometries and parametric objects. RailClone is multi-threaded and highly optimized for faster performance so you don’t have to worry about speed.
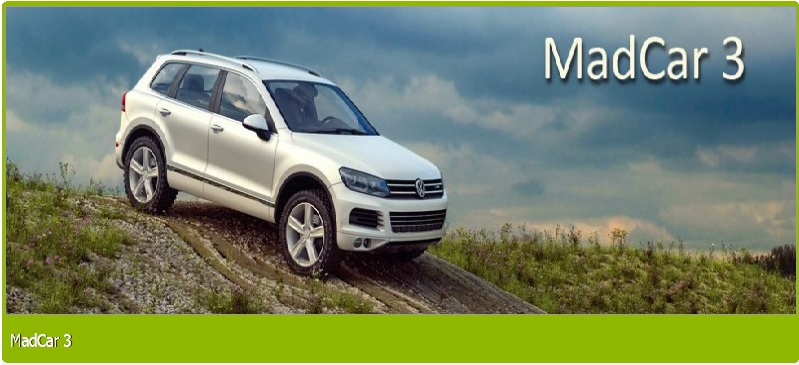
MadCar 3
MadCar is a great tool to create great vehicle rigs for cars, bikes, trucks or any wheeled vehicle. Mad car provides user a control over each wheel and suspension to achieve a realistic and believable moving vehicle.
Bones Pro
Skinning is one of the most important and difficult process at the same time. Bad skinning and deformations can easily take away all the charm of your character. Bones Pro is an awesome tool that makes the skinning process better and easy.
You can now rig elbows and knees with no more intersections, jiggling muscles, muscle/object collisions within less amount of time.Citytraffic
City Traffic is a smart plugin which creates AI based traffic simulation. It has lots of cool features like Road networks (Spline based), Bus stops, Speed limiters that help you create realistic traffic flow for your projects. CityTraffic supports 3ds max 2008 – 2014 (32 or 64 bit)
AR-media
Armedia gives user a freedom to create their own augmented reality models that can be viewed on their own desktop with the help of a webcam and by printing a suitable code. It’s a cool plugin to visualize your 3d models out of your computer screen.
Pulldownit
Pulldownit is a great dynamic solver used to create fractures and simulates rigid bodies. It comes with tools like Shatter it! which is a Voronoi-based pre cutting tool and some more useful features which allow user to create cool looking fracture effects.
Cebas Thinking Particles 5
Thinking Particles is a particle simulator which offers non-linear particle dynamics. Unlike 3ds max native particle flow, TP operates particles on the basis of rules and conditions. It’s an ultimate pack for creating rigid-soft bodies, vehicle simulations, vertex particles, fragments and many more.
Labyrinth
Labyrinth is a spline based plugin that generates splines over the object that user wants. User has full control over the points that are attached to the splines. Labyrinth is an ideal tool for creating spider webs, ropes and cool abstract effects. This tool is available for 3ds max 2012-2014 (64 bit)
I hope you enjoyed this post. You can watch the videos and demos on the official websites of the plugins to have a deeper look and add them into your list if you want. Thanks
Table of Contents
MadCar 3 is plug-in for 3ds Max for quick rigging of wheeled vehicles and their animations by simulating the control. This new version allows rigging vehicles with any number of wheels and with any of their mutual arrangements. Any number of trailers is also supported.
There are simplified behavioural settings for each of the wheels and related components, which can be fine tuned if required. This allows to simulate motion of any type of vehicle - from a race car to a heavy truck. Animation is created during simulation in real time. Simulation can be controlled by keyboard, joystick, game controller or steering wheel. It is also possible to set up ‘Follow path’ and ‘Follow the Object’ mode.
Enable, Disable Command Prompt using GPO or Windows Registry. HKEYCURRENTUSER Software Policies Microsoft Windows System. So after this steps, you will no longer see any activation watermark and the most amazing thing is that you can Customize your Window. So in this Article, I Will Share Working trick how to activate windows 10 with cmd. How to activate any software using cmd in windows. Today I will show you how to activate windows 10 using CMD. CMD is nothing but your Command Prompt. We often find that there is a watermark on our PC indicating “activate windows” if our windows is not activated. Today I will show you the Windows 10 activation without any software. This is actually done in very simple steps. How to Activate Windows 10 Using CMD without any software. You can easily activate your windows 10 pro operating system. Just follow the few steps and enjoy using Windows 10. Step1: You need to press Windows Key + X then you can select Command Prompt (Admin). Read Also: How to Delete Temporary Internet Files Command Line. Hey, do you want to activate Windows 10 for free? I had been using Windows 10 for a year now but I had the annoying activation watermark. However, I found a super quick way to activate Windows 10 using CMD and no activation key is required. Anyone can do that as it’s nothing more than some baby-steps. There was an annoying watermark at the right corner of my screen which keeps on displaying even if I was working in any software that watermark still was at its place. For this solution, I had to activate my windows and I have found a very quick method to Activate Windows 10 using CMD and no activation key is needed.
The package also includes a procedural map that generates tire marks on the surface over which vehicle is moving (V-Ray only).
3ds Max versions: 2009, 2010, 2011, 2012, 2013, 2014, 2015, 2016, 2017, 2018, 2019, 2020
3ds Max Design : all
Tire marks require V-Ray
OS: Windows XP, Windows Vista, Windows 7, 8, 10 all 32 and 64 bit
Microsoft Visual C++ 2010 Redistributable Package (probably already installed on your PC)
User must have local administrator rights with Windows XP to use MadCar. on Windows 7 administrator right needed only during installation
Users are provided with the same installation file for both Workstation and Render node
MadCar.exe
Workstation can be used only when license is properly installed, and provides access to all MadCar options.
If MadCar does not find license file it switches itself to Rendernode mode and only can open and render files created with MadCar Workstation
Rendering is available both locally and over network.
To install the program you need to run the MadCar.exe.
for versions 3.026 and higher please see http://docs.rendering.ru/en:cerber-protection
For network rendering just install the same file MadCar.exe. Installation procedure is the same as for the Workstation, but skipping Registration process. Rendernodes do not require registration.
Submission for network or distributed rendering should be done from the PC with the activated version of MadCar. The rest of render nodes involved in the network or distributed rendering do not need to be activated.
Each MadCar license comes with unlimited render nodes.
manual installation on render nodes:
install 1 machine with the *.exe file then copy pluginsMadCar.dlo to other rendernodes.
Once installed MadCar can be created from command panel:
Create > Helpers > MadCar
Plug-in includes the following object types:
- Suspension is for damper.
- MadCar is managing skin.
- Start Position sets the initial position of the car.
- Trailer Hitch and Trailer Tongue object for connecting vehicles.
Do not scale and mirror these objects. Only rotation and movement is acceptable.
All objects are linkable with geometry
Chassis can be linked with geometry of a car frame.
Suspension can be linked with geometry of brake blocks and suspension mount parts.
Wheel can be linked with wheel geometry.
Chassis sets the overall dimensions of the car, its mass and solidity at sudden wheels collision with surface.
- Length equals to half length of a car.
- Mass is the car mass in kilograms. Solidity is the car’s structural stiffness.
Mass value determines car’s reactivity/inertness. The heavier it is, the stronger the suspension sags, and slower the car accelerates and stops.
Solidity sets deformation resistance. At sudden collision of wheels with surface wheel axes can bend and diverge from the initial position. Divergence is less at high solidity.
Position of the rotation axis affects the behaviour of steering wheels. Below are examples for the values of -75%, 0%, 75%.
Suspension section controls car suspension settings such as length of crossover suspension links, spring rigidity, oil damping, buffer gas tension, suspension block limits, Engine drive, steering and other settings.
Length is the length of crossover suspension link.
Top Stop and Bottom Stop are the top and bottom suspension block stops
Wheel Drive is engine drive.
Steering Gear is steering linkage. Wheels will turn when the steering wheel turn.
Handbrake sets the wheel locking with the handbrake.
Plug-in presents a model of gas-oil damper.
Damper shift is the shift of the damper’s top holder
Presets help making quick setup without deep knowledge on damper functioning – you have an opportunity of selecting the preset of damper parameters.
Rigidity Factor lets you correct the resulting damper resistance value without fixing multiple parameters one by one. In most cases using these settings is enough for regulation.
Additional Damper Settings are for detailed setup of damper parameters. These settings are intended for advanced users with ability of fine-tuning of damper parameters.
Running-in test mode the system generates road irregularities in real-time mode and displays damper response to them.
- Spring Rigidity is spring stiffness.
- Buffer Rigidity is buffer stiffness.
- Running-in Stand Setting are the parameters of test stand.
- Mass per Damper: it is the mass which falls on the damper. For example, if the car with 4 wheels has the mass of 1000kgs, then 250kgs will fall on each damper.
- Gravity: it is the acceleration of free fall/ gravity factor. It is presented in centimetres – 980cm/s2, meters - 9.8m/s2 or inches - 386“/s2.
- Road Knoll Rate is the frequency of knolls spread upon the road.
- Road Hole Rate is the frequency of holes spread upon the road.
Wheel section sets the dimensions and properties of wheels.
- Width is the wheel’s width.
- Ruggedness is the wheel’s stiffness. The less the ruggedness, the deeper the wheel’s elastic deformation upon surface.
- Grip is the constant of surface friction. The greater the constant of friction, the less the car skidding, but with that the chances of roll-over at tight turns are higher. At the installation of wheel make sure the arrow of wheel points to outside direction, not inside the car.
Tread Pattern – tire mark. Used to generate textures of tire marks. An example of the orientation of the tread.
When setting a wheel the wheel arrow must point outside and not inside the car.
This object represents the skin combining all car components into one integral unit.
Car Setup is the car’s assembly into one unit.
Dummy Size sets the skin’s size.
All components occurred inside the skin will be automatically applied.
For the assembly of the car there should be one chassis object inside the skin together with the equal number of wheel and suspension objects.
Each pair of suspension and wheel should have equal position as it shown below:
Position all the car components according to the needed configuration. As below, for instance:
Then press Update (Lock Component)
In case of successful assembly the components should be locked (it will be impossible to move them) and blue coloured as shown below. After that any changes to the components will not affect the whole unit. To update the parameters you need to press Update (Lock Component) once again.
If you want to unlock the components and change their location press Reset(Unlock Component).
Parameters
Parameters are general parameters.
Gravity is the acceleration of free fall/ gravity factor. It is presented in centimetres – 980cm/s2, meters - 9.8m/s2 or inches - 386”/s2.
Surface is the object of surface upon which the car will be moved. After the selection and changing of object and loading of the scene it is necessary to press Update Surface. It is connected with the algorithm of wheel interaction with the ground, this algorithm uses ray-trace accelerator which reasonably speeds up the counting process and makes counting time almost independent on the number of polygons within the surface.
Start Position defines the object location of which will be the starting position of the car. If the object is selected, then after pressing Update (Lock Component) the car will be replaced automatically to the starting position.
Animation
Animation includes counting and animation settings:
Step/Frame fixes the number of keys for the frame. High value of this setting improves accuracy of counting, but reduces the speed of counting; it also leads to the increase of the scene’s size on HDD. Low value of this setting may lead to uneven running of wheels at high driving speed.
Samples fix the number of counted/imputed samples per step. High value of this setting improves accuracy of counting, but reduces the speed of counting.
Low values of the above settings may lead to wheels vibration and car sliding down the sloping surface being at rest with brakes on.
Driving Parameters
Driving Parameters are car driving settings.
Rudder Sensitivity is the response of steering wheel. Lower value makes the rudder less reactive. Fix this setting at low values to get smooth/slow turning of wheels, high values will lead to fast wheels turn.
Rudder Angle is the ultimate steering lock.
Bike Driving turns on motorbike control system
AutoBalance helps motorbikes to keep balance and prevents from falling
Motorbike rigging video tutorial:
Differential Drive Sensitivity - multi directional movement of the wheels when turning. E.g. when turning right, the right wheel will be spinning backward, left - forward.
Throttle Sensitivity is the response of accelerator pedal. The higher the value, the higher the impulse given to the driving-wheels.
Brake Sensitivity is the response of brake pedal. High value makes the braking more active/intense.
Max Drift Speed - Максимальная скорость проскальзывания колес выше которой автоматически отпускается газ и тормоз. Чем меньше этот параметр тем более предсказуемо ведет себя машина но меньше возможностей экстремального вождения. Малые значения (1-3 км/ч) рекомендуются для начинающих водителей.
Time Delay is the time delay between frames, it is set in milliseconds. Time delay is necessary for the distinguishing of CPU time needed for the mouse and keyboard reaction. If the value is too small driving control may have late response or even be blocked. In this case time delay should be extended.
Driving Type is the type of driving control. The following variants are possible:
Mouse is driving control with the mouse. Mouse movements to the left or right direction make the wheels turn respectively. Mouse movements up and down correspond to acceleration and deceleration. Wheel’s running forward throws into forward gear. Wheel’s running backward throws into reverse gear. The mouse right button is responsible for handbrake.
Keyboard is driving control by means of keyboard. “A” key is for turn to the left. “D” key is for turn to the right. “W” key is for accelerator. “S” key is for brake. SPACEBAR is for handbrake. PAGE UP throws into forward gear. PAGE DOWN throws into reverse gear.
Joystick driving controls are: 4 is forward gear. 2 is reverse gear. 3 is handbrake.
Steering Wheel driving controls: Gearbox handle is responsible for gear shifting (forward gear/reverse gear), marked button is for handbrake.
Target is a target object/ an object to follow. Forecast frames present the number of frames where the car foreshows the movement of object for the track calculation.
Drive
It activates the car driving window.
To start/stop driving press ENTER.
In order to join two vehicles add Trailer Hitch to the track in place where trailer will be attached.
Add Trailer Tongue to the trailer in place where truck will be attached.
Join Trailer Hitch with Trailer Tongue as shown below
Vehicles are now joined.
From now on if you move the truck the trailer will follow it
MadCarTrackTexture. Is used for making tire marks.
MadCar Object - the MadCar object from which the texture generating traces.
- General Intensity - the intensity of the traces in the normal movement of a vehicle.
- Brake Intensity - the intensity of the traces when a wheel is slipping.
- Samples - quality of marks. High values slow down the render.
- Base Bump Intensity - total intensity of the bump.
- Pattern Bump Intensity - bump value of the tire pattern.
MadcarTrackTexture need to be used in material of the object MadCar is driving on.
It can be used in any slot (Diffuse, Bump, Specular etc). In texture settings you need to specify which MadCar object it belongs to. If you need marks from multiple MadCars you need to mix several MadcarTrackTexture
Collisions in MadCar.
Only minimal processing would be required if we had a perfect acquisition system. Vista seismic.
There are 2 types of collisions to be calculated in MadCar simulation1. Collisions between the wheels and the ground2. Collisions between ”Collision Spheres“ and the ground.
By default, a car's body does not simulate the possible collision with obstacles or the ground in a rollover.If you need to simulate such an event, you need to add”Collision Spheres” to MadCar rig. Place them so that their combined volume is repeating the shape of your vehicle.
Try to keep number or spheres as little as possible (optimal number is 10-20), otherwise it may slow down the process of simulation. The “Rigidness” parameter controls the stiffness of the collision, and the parameter “Grip” controls friction. Obstacles that you are going to impact your car should be included in the geometry of the surface.
Collision Spheres usage example:
We recently released a baking script
after you dropped it to your scene, you need to add to interface via 'Customize User Interface'
when baking, actual objects need to selected
Common problems
MadCar algorithms are based on real world physics, this requires real world dimensions of vehicles and other settings for correct work.
Controlling your vehicle
For perfect results in controlling your vehicle make sure all physics is correct, and simulate step by step
Start driving untill the point its starts going wrong, stop, rewind to the point it was fine, and continue from that pointthis applies to any controls you use
Following target or spline
MadCar based on the simulation with real life physical properties - and this is not always predictable. Abilities of a vehicle are limited by its physical parameters, turning radius, friction, brake force, power of the engine etc. But the motion of a target is not limited, so the vehicle can not always follow the target, because it has got real life physical limitations, so it can only try to do it.
License errors
In case of license malfunction and errors (which can be caused by disk reformatting, re installation of the operating system or components replacement) you are free to address the developer at any time by sending your request for a new *.lic file to the e-mail mail@rendering.ru
ATTENTION! Please always try to email from the same email address you used when you purchased the plug-in. If we can’t find your e-mail address from which you sent the CID file in our database and there is no explanation and receipt or order number in you email, your request may not be processed!
Please always attach you receipt or include order number to avoid any delays in communication.
Dll errors
- Dll failed to initialize
- Error code 126 - The specified module could not be found
please make sure you have Microsoft Visual C++ 2010 Redistributable Package 32bit or 64bit installed
Microsoft Visual C++ 2010 Redistributable Package (x86)http://www.microsoft.com/en-gb/download/details.aspx?id=5555
Microsoft Visual C++ 2010 Redistributable Package (x64) http://www.microsoft.com/en-gb/download/details.aspx?id=14632
on windows server 2012 check that c:windowssystem32XINPUT9_1_0.DLL exist, this can be found on windows 7
Installation problems
make sure 3ds max is not running, (please double check in task manager too)
make sure you are installing with administrator rights (in windows 7 right click “run as administrator” even if you are logged in as admin)
make sure you choose right path for you 3ds max version
Other errors
Please make sure you download and install latest version from our forumand confirm that update was successful by checking version number in About panel of MadCar.
if this have not solved the problem please contact us at mail@rendering.ru , by sending description of the problem together withthe following information:
- MadCar version (screenshot of About panel is required)
- 3ds max version (inc 32 or 64 bit)
- some screenshots